highlight: atom-one-dark theme: vuepress--- 一起养成写作习惯!这是我参与「掘金日新计划 · 4 月更文挑战」的第2天,点击查看活动详情 (opens new window)。
大家好~我是
米洛!
我正在从0到1打造一个开源的接口测试平台, 也在编写一套与之对应的教程,希望大家多多支持。
欢迎关注我的公众号米洛的测开日记,一起交流学习!
# 回顾
上一节我们编写了工作台部分内容,期间修复了不少bug,也完善了很多特性。鉴于最近gitee不再提供图床功能了,所以我们要自己切换到免费的七牛云存储之中。
话不多说,我们接着肝。
# 修改配置
还记得我们之前做过的配置文件吗?我们把oss类型改为qiniu,并附上我们申请好的token。

# 添加Config中关于七牛云oss的配置项

# 完善app/middleware/oss/qiniu.py
import os
from io import BytesIO

import aiohttp
from qiniu import Auth, put_stream, BucketManager

from app.middleware.oss import OssFile
from config import Config


class QiniuOss(OssFile):
    _base_path = "pity"

    def __init__(self, access_key_id: str, access_key_secret: str, bucket: str):
        self.auth = Auth(access_key_id, access_key_secret)
        self.bucket = bucket
        self.bucket_manager = BucketManager(self.auth)

    def get_full_path(self, filepath, base_path: str = None):
        base_path = base_path if base_path is not None else self._base_path
        return f"{base_path}/{filepath}"

    @staticmethod
    def _convert_to_stream(content):
        stream = BytesIO()
        stream.write(content)
        return stream

    async def create_file(self, filepath: str, content: bytes, base_path: str = None):
        key = self.get_full_path(filepath, base_path)
        token = self.auth.upload_token(self.bucket, key, 3600)
        file_name = os.path.basename(filepath)
        ret, info = put_stream(token, key, QiniuOss._convert_to_stream(content), file_name, len(content))
        if ret['key'] != key:
            raise Exception("上传失败")
        return QiniuOss.get_url(key), len(content), None

    @staticmethod
    def get_url(key):
        return f"https://static.pity.fun/{key}"

    async def update_file(self, filepath: str, content: bytes, base_path: str = None):
        token = self.auth.upload_token(self.bucket, filepath, 3600)
        file_name = os.path.basename(filepath)
        key = self.get_full_path(filepath, base_path)
        ret, info = put_stream(token, key, content, file_name, len(content))
        if ret['key'] != key:
            raise Exception("更新失败")

    async def delete_file(self, filepath: str, base_path: str = None):
        key = self.get_full_path(filepath, base_path)
        self.bucket_manager.delete(self.bucket, key)

    async def list_file(self):
        pass

    async def download_file(self, filepath, base_path: str = None):
        key = self.get_full_path(filepath, base_path)
        exists, _ = self.bucket_manager.stat(self.bucket, key)
        if exists is None:
            raise Exception("文件不存在")
        base_url = '%s/%s/%s' % (Config.OSS_URL, self.bucket, filepath)
        url = self.auth.private_download_url(base_url, expires=3600)
        content, real_name = await self.download_object(key, url)
        return content, real_name

    async def download_object(self, filepath, url, timeout=15):
        async with aiohttp.ClientSession() as session:
            async with session.request("GET", url, timeout=timeout, verify_ssl=False) as resp:
                if resp.status != 200:
                    raise Exception("download file failed")
                real_filename = filepath.split("/")[-1]
                path = rf'./{self.get_random_filename(real_filename)}'
                with open(path, 'wb') as f:
                    data = await resp.content.read()
                    f.write(data)
                    return path, real_filename

    async def get_file_object(self, filepath):
        pass
        # if not self.bucket.object_exists(filepath):
        #     raise Exception(f"oss文件: {filepath}不存在")
        # file_object = self.bucket.get_object(filepath)
        # return file_object.resp.response.content
2
3
4
5
6
7
8
9
10
11
12
13
14
15
16
17
18
19
20
21
22
23
24
25
26
27
28
29
30
31
32
33
34
35
36
37
38
39
40
41
42
43
44
45
46
47
48
49
50
51
52
53
54
55
56
57
58
59
60
61
62
63
64
65
66
67
68
69
70
71
72
73
74
75
76
77
78
79
80
81
82
83
84
85
这里直接就贴了代码,我们稍微讲解一下。
auth
auth是七牛云的认证对象,我们可以通过它上传/下载文件。
bucket_manager
是bucket的管理对象,我们可以通过bucket去查询对象的信息。
download_object
由于七牛云不提供直接下载的功能,而是采用提供一个链接的形式,所以我们得自己写一个http请求(异步)去获取url的content数据,并把它写入临时文件,这点和之前比较相似。base_path
之所以需要base_path,是因为我们的oss分为很多类别,比如用户头像,项目头像,以后还可能会有其他的头像,我们需要与
测试数据(文件上传用到的测试数据)分开,所以我们设立了这个基础路径,以后测试数据就都从这个目录获取,而头像则都设置base_path为avatar。说白了就是为了区分数据。get_url
我们的url都是固定的,自己的域名+存储的路径,所以我们是可以直接拼凑出来的。
_convert_to_stream
# 这个方法比较特别,由于七牛云上传只支持
文件路径or文件流对象,所以当我们拥有bytes数据的时候,需要转换为BytesIo数据,特此编写了这种方法。总结一下,七牛云oss和其他oss还是有一些不一样的地方,但毕竟免费,所以就适应一下啦。
# 修改app/middleware/oss/__init__.py
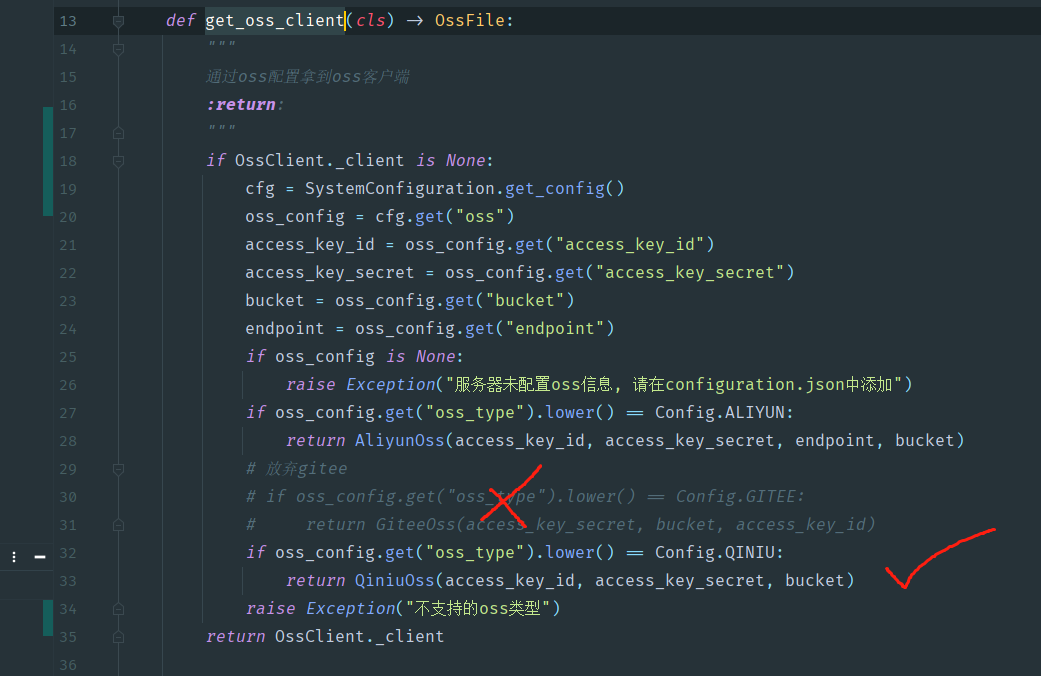
我们修改get_oss_client方法:

以后支持其他oss可以继续再此添加。
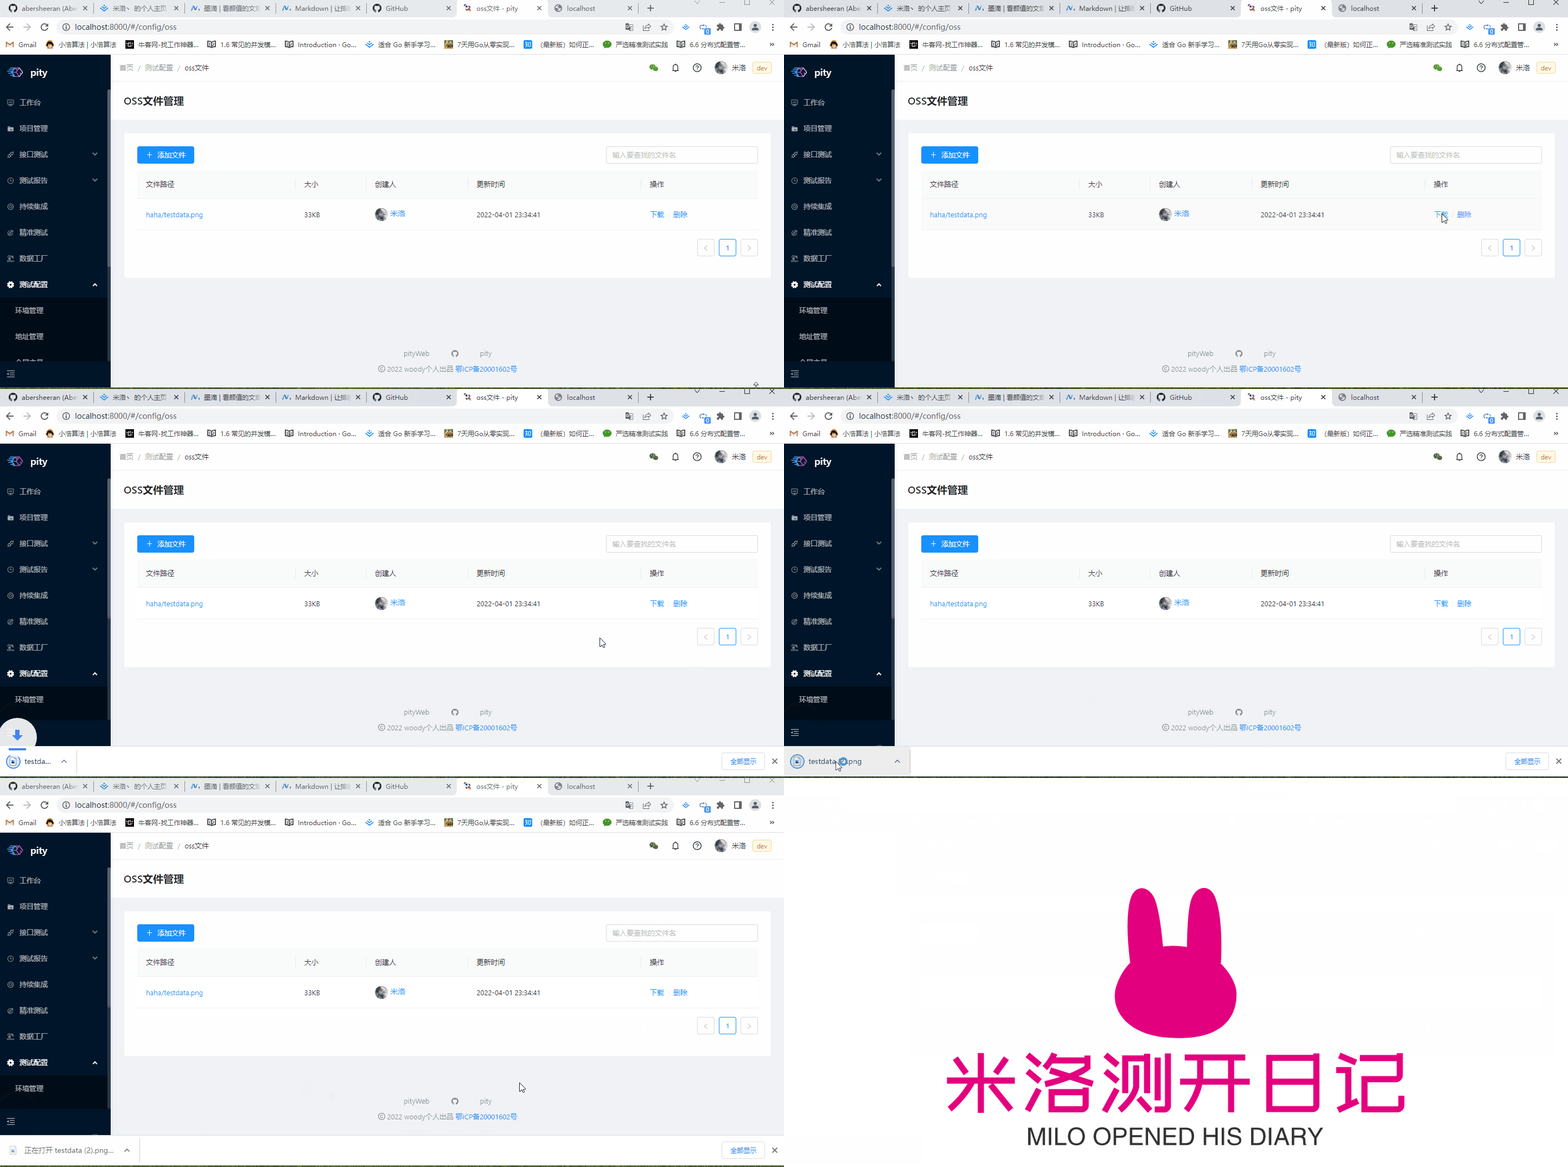
# 测试下页面是否正常

可以看到,下载正常。那其他的博主也跑了跑,因为基本都是调七牛的api,所以也没啥问题。
今天的内容就先介绍到这里,下一节讲述如何用github action完成自动部署功能,节约大家的时间!


v1.5.1